A Critical Look at Jotform's Enterprise 2.0 Launch and Feature Updates
November 19, 2025 • 6 min read
TrustedForm provides digital certificates that prove who submitted your form, when they did it, and how - including their consent. Whether you need to comply with regulations, protect against disputes, or simply build trust with your users, TrustedForm ensures every submission is backed by tamper-proof evidence.
In this step-by-step guide, we'll walk you through setting up TrustedForm with Jotform so you can start capturing and automating the retention of your certified submissions.
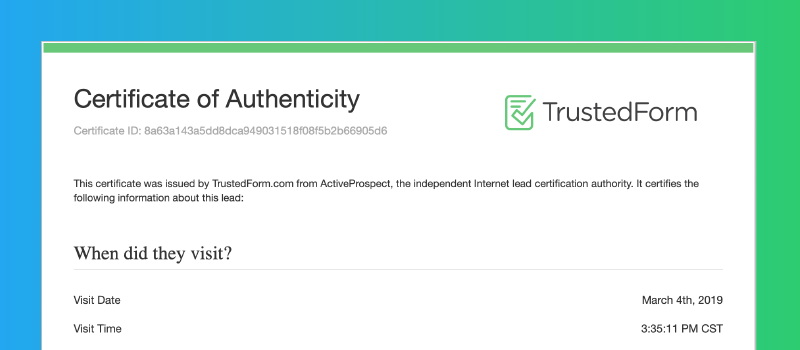
Example of a TrustedForm Certificate issued for a completed form. Source: LeadCapture
This method only works when you embed your form on a webpage you control (like your own website). It won't work if you're using Jotform's default hosted form links (e.g., https://form.jotform.com/yourFormID).
Why? Jotform's hosted forms don't allow you to add custom scripts (like TrustedForm). But if you embed your form using the Source Code option (on your website, a landing page, or even a custom HTML block in your site builder), you're all set.
First, you'll add a field to your form that will automatically capture the TrustedForm certificate URL.
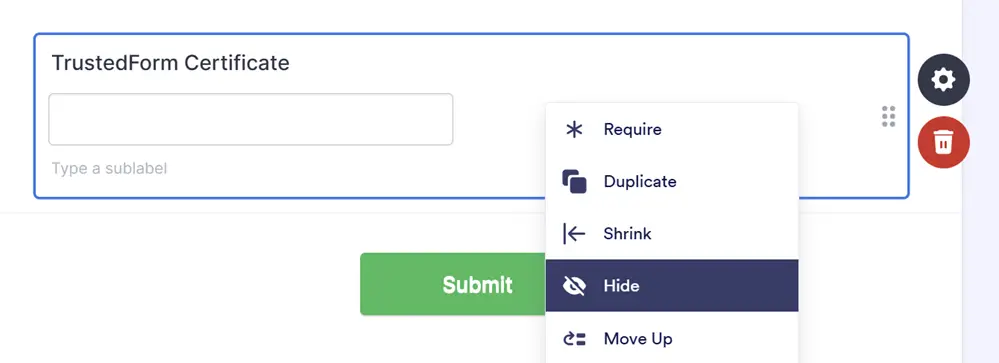
Adding a hidden Short Text field to capture the TrustedForm certificate URL
Jotform assigns each field a unique identifier that TrustedForm needs to reference. Here's an easy way to find it:
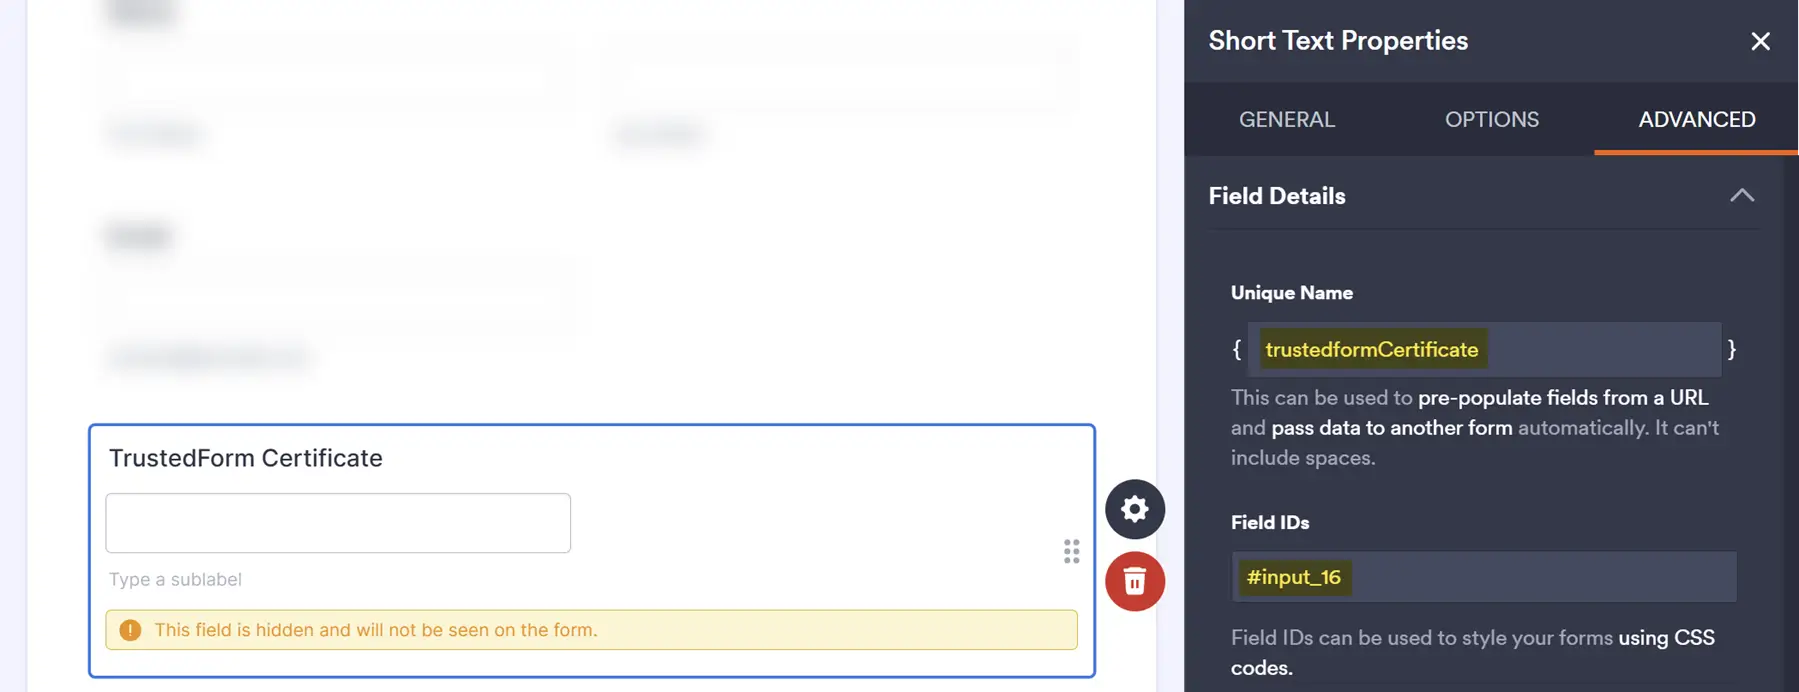
Finding your field's Unique Name and Field ID in the Advanced settings
You'll see two pieces of information:
trustedformCertificate#input_16Keep this window open - you'll need these in the next step.
Now we'll create the TrustedForm script with your specific field information.
Use this tool to automatically generate the correct field name for your TrustedForm script:
Paste your Jotform field info to generate the TrustedForm field name
Copy this script and replace the field value with your generated field name from above:
<!-- TrustedForm -->
<script type="text/javascript">
  (function() {
    var field = 'q16_trustedformCertificate'; // Replace with YOUR field name from above

    var tf = document.createElement('script');
    tf.type = 'text/javascript';
    tf.async = true;
    tf.src = ("https:" == document.location.protocol ? 'https' : 'http') +
      '://api.trustedform.com/trustedform.js?field=' + escape(field) +
      '&use_tagged_consent=true&l=' +
      new Date().getTime() + Math.random();
    var s = document.getElementsByTagName('script')[0];
    s.parentNode.insertBefore(tf, s);
  })();
</script>
<noscript>
  <img src='https://api.trustedform.com/ns.gif' />
</noscript>
<!-- End TrustedForm -->About the use_tagged_consent=true parameter: This enables more accurate consent verification if you add consent tags to your form in the future. For more information, see TrustedForm's consent tagging documentation.
If your form spans multiple pages, you can use the identifier parameter to link a user's progress across pages. This creates a unified certificate that captures the entire multi-page journey.
<!-- TrustedForm -->
<script type="text/javascript">
  (function() {
    var field = 'q14_certificateUrl14'; // Replace with YOUR field name
    var identifier = 'YOUR_SESSION_ID_HERE'; // Replace with your session/tracking ID

    var tf = document.createElement('script');
    tf.type = 'text/javascript';
    tf.async = true;
    tf.src = ("https:" == document.location.protocol ? 'https' : 'http') +
      '://api.trustedform.com/trustedform.js?field=' + escape(field) +
      '&identifier=' + escape(identifier) +
      '&use_tagged_consent=true&l=' +
      new Date().getTime() + Math.random();
    var s = document.getElementsByTagName('script')[0];
    s.parentNode.insertBefore(tf, s);
  })();
</script>
<noscript>
  <img src='https://api.trustedform.com/ns.gif' />
</noscript>
<!-- End TrustedForm -->
Select the Source Code embed option to get the full form HTML
Now you'll place both the Jotform code and TrustedForm script on your webpage.
If you're creating a dedicated landing page just for this form, this is the cleanest approach:
<html>
<head>
  <title>Contact Form</title>
</head>
<body>

  <!-- Your Jotform code goes here -->

  <!-- Your TrustedForm script goes here -->

</body>
</html>Using a website builder? Most website builders have an "HTML" or "Embed Code" block that lets you paste custom code. See the instructions for your specific platform below.
If you need to add the form to a page that already has content, styling, and other code, follow these steps to prevent conflicts:
<div id="jotform-container" style="all: initial;">
  <!-- Your Jotform source code goes here -->
</div><style>
#jotform-container * {
all: revert;
}
</style>Why this helps: The style="all: initial;" prevents your website's styling from affecting the form, while all: revert; ensures the form's internal elements still work properly. The TrustedForm script stays outside this container so it can properly track form activity across your page.
Note: Yes, <style> tags can be placed in the <body> - this is valid HTML5 and widely supported by all modern browsers.
Your final page should look something like this:
<!-- Existing page content before the form -->
<style>
  #jotform-container * {
    all: revert;
  }
</style>
<div id="jotform-container" style="all: initial;">
<!-- Your Jotform source code goes here -->
</div>
<!-- Your TrustedForm script goes here -->
<!-- Existing page content after the form -->
https://cert.trustedform.com/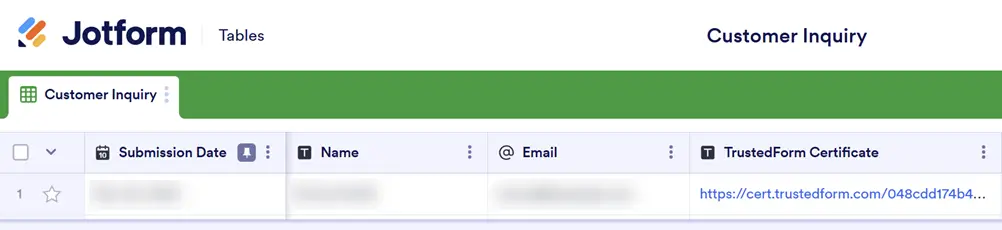
A successful integration shows the certificate URL in your submissions
If the field is empty, double-check that:
TrustedForm automatically captures a complete record of the form submission through session replay, including:
This creates verifiable proof of consent without storing sensitive data in plain text.
By default, TrustedForm certificates expire after 72 hours if not claimed. To keep certificates for compliance purposes, you have three options:
TrustedForm can automatically retain certificates for forms on your verified domain:
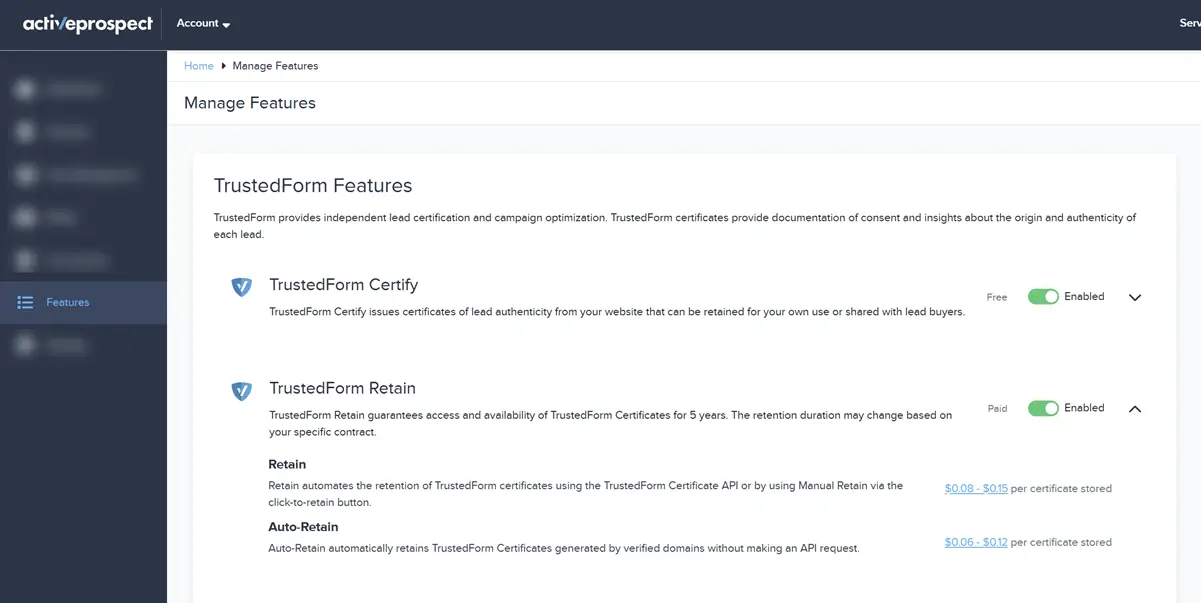
Enable Retain feature for TrustedForm app

Add your form's domain in the ActiveProspect account settings
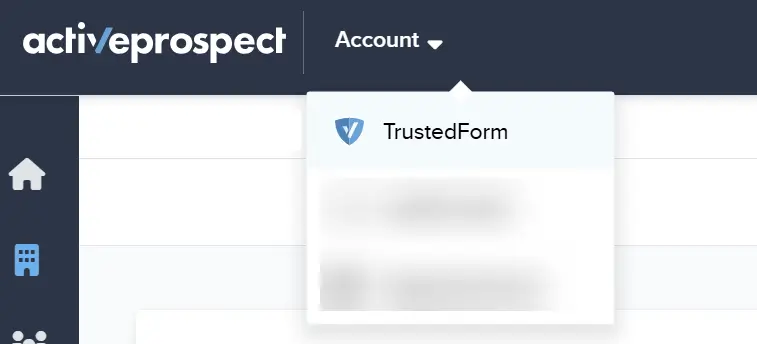
Navigate to TrustedForm from your ActiveProspect account
Once enabled, every certificate generated on your verified domain will be automatically retained in your account. Each retained certificate incurs a small storage fee (normally cheaper than claiming the certificates using API).
If you need more control or want to process certificates selectively, you can claim and retain them via the TrustedForm API. This is useful when:
Make.com Template (Coming Soon): We're creating a Make.com template that automatically claims and retains certificates when someone submits your Jotform. This will handle the API calls for you.
For now: See TrustedForm's API documentation for details on claiming and retaining certificates programmatically.
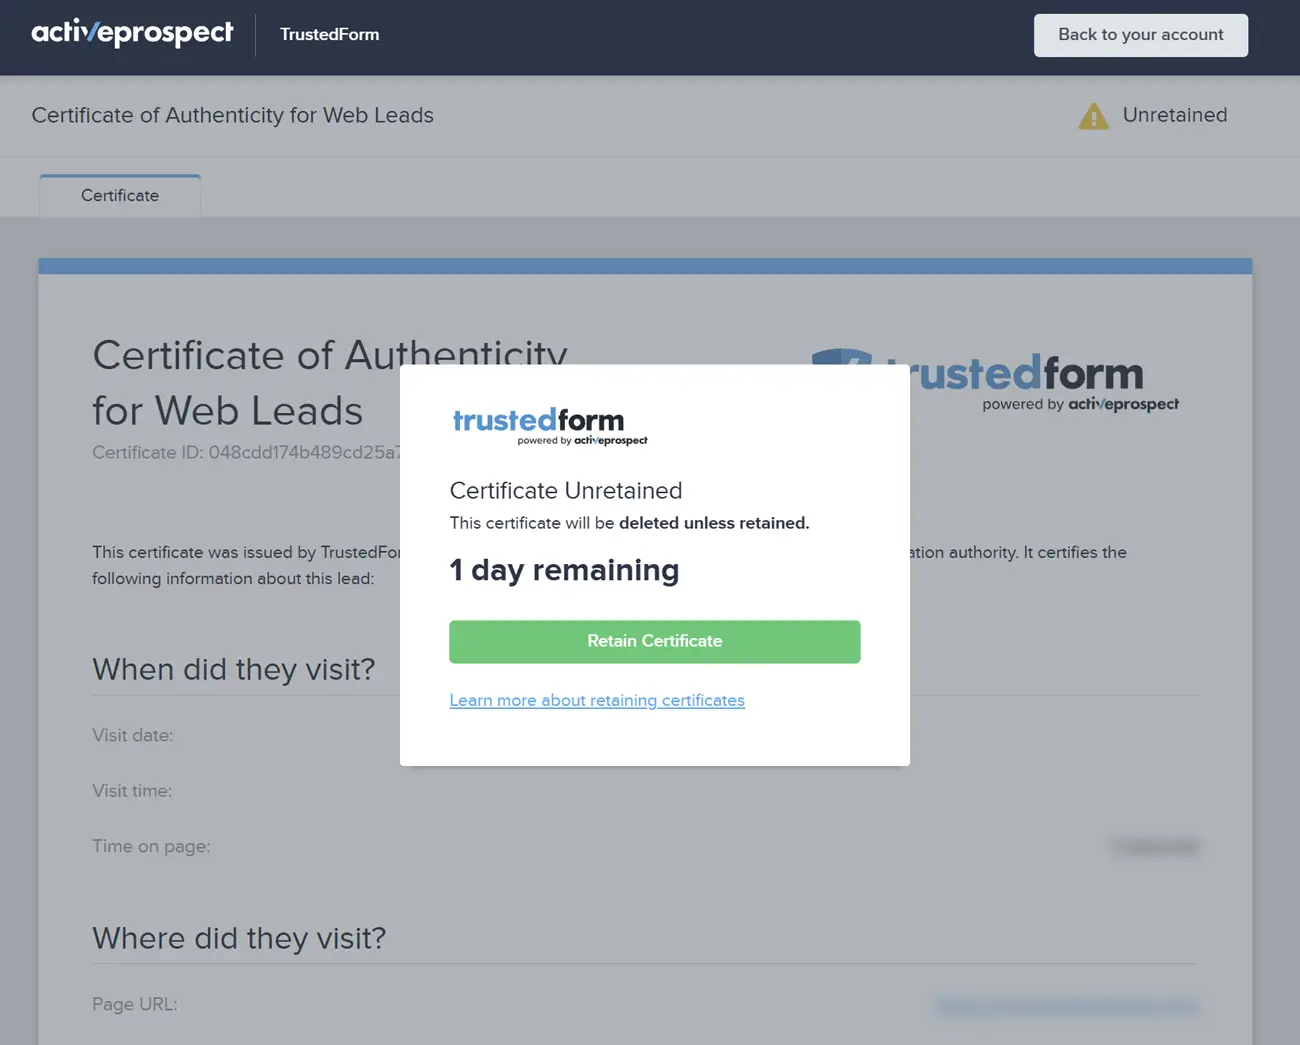
TrustedForm's unretained certificate
You can also claim certificates manually by visiting the certificate URL directly. Here's how:
https://cert.trustedform.com/)Important: Certificates expire after 72 hours if not claimed or retained. Make sure to process certificates promptly to avoid losing them.
Note: "Claiming" and "retaining" are functionally the same - both actions preserve the certificate beyond the 72-hour expiration window. The terminology differs slightly depending on whether you're using the API (claim) or the web interface (retain).
That's it! Your Jotform submissions are now backed by TrustedForm certificates, giving you verifiable proof of consent for every lead.
With this integration in place, you can confidently demonstrate compliance, protect against disputes, and build trust with partners who require documented consent.
Subscribe to our newsletter to receive the latest news from SaaS, tips, tricks and insights directly to your inbox.